Your guide to DIY electronic, woodworking, camping projects and more
Outdoors/Camping
Projects that involve outdoors, wilderness or camping, survival, etc.
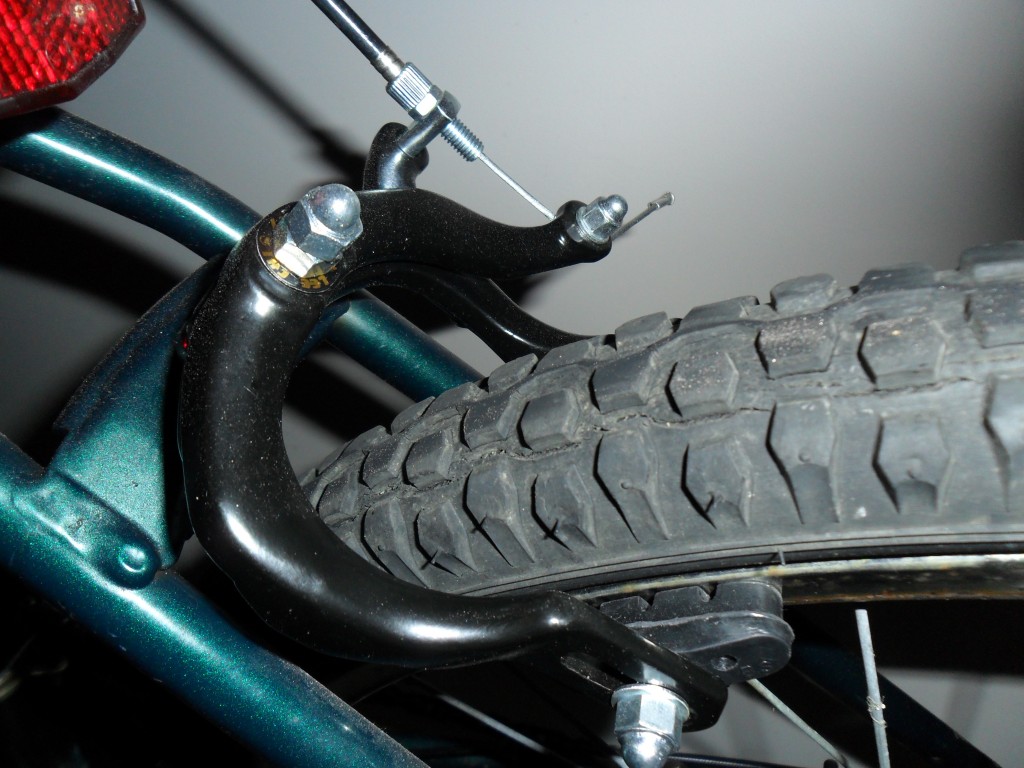
How to install new side-pull caliper brakes on a bike
012 years
 Here’s a simple project just about anyone can do in an hour or so. So you bike brakes won’t stop? Do the brake pads look worn down and uneven? Are the brackets themselves bent out of place? Rusted through?
You can easily replace side-pull caliper brakes yourself and make your bike safe to ride again. Note: properly functioning brakes are important to safe operation of a bicycle. Never operate a bicycle without properly functioning brakes. If you feel uncomfortable with your own ability to safely repair your own brakes, a neighborhood bike shop can do the repair for you.
If you’re interested in making the repair yourself, read on.
Materials:
- Depending on what pieces have failed you’ll need new brake pads and possibly a new caliper mechanism
- This is also a good time to replace your brake cables, that may be fraying, rusting or no longer sliding easily.
- You can get kits like this one that include all the parts for one low price:
Make sure that you purchase the correct components to fit your bicycle. There are several styles of brakes including disc brakes , side-pull brakes
, and V-brakes
. Make sure you purchase the correct size for your type of bike.
Step 1: Remove the old brakes. Start by loosening the bolt that holds the brake cable to the caliper; once removed, you should be able to fully separate the caliper releasing the brake pads from around the bicycle wheel. Next, loosen the bolt that holds the caliper assembly to the frame of the bike and remove the caliper entirely.
Step 2: If you are only replacing brake pads, now is the time to swap your new pads onto the calipers and re-install.
Step 3: If you are are fully replacing your calipers, install the new calipers paying close attention to the fit of the brake pads. You will likely need to adjust the placement of the brake pads to match your bicycle wheel. It’s also a good idea to clean your bike wheel to remove any dirt or grease that might cause problems for proper braking.
Step 4: Once the caliper is reattached, tighten the bolt and thread the brake cable through its place on the caliper. If the cable shows any signs of fraying, it should be replaced.
Step 5: Adjust properly. To properly adjust the brake cable tension, start with the brake lever fully released and the thumb screw adjustment at its lowest setting. Gently hold the brakes close to the wheel and tighten the screw holding the cable to the caliper.
Step 6: Test the brake operations by squeezing the brake lever. The brake should squeeze firmly, but release to allow free movement when the brakes are not applied. Use the thumb screw adjustment to find the right adjustment. Take time to adjust until the brakes operated properly. If you are unsure, consult a bike shop before operating your bicycle.
Step 7: Repeat the same steps to replace your second brake caliper.
Once you’re satisfied that the repair has been made properly, enjoy your handiwork with a relaxing safe ride.
- Replacing side-pull caliper brakes on a bicycle
How to Grow Tomatoes from Seed
016 years
Are you interested in how to grow tomatoes? Want to start from seeds and grow tomatoes? You can! With a little patience you can grow your very own tomato plants from seeds and be enjoying your very own tomatoes very soon!
What you need:
- Potting soil
- A small pot
- Tomato seeds- pick any variety you like! there are MANY kinds
How to sprout tomatoes from seeds:
- Fill a small pot with potting soil
- Moisten the soil with water
- Add your seeds about 1/2 inch into the soil. Add a few per pot, in case some don’t sprout.
- Place in a sunny window or on porch, in garden, etc. Seed sprout best around 70 degrees.
- Keep the soil moist. in the hot summer this may take watering several times per day. Your mileage may vary.
- In a few days. you will see the seeds start to sprout. You may continue to water and wait for them to grow larger or transplant them now into your garden.
- As the plants grow, be sure to add a tomato cage to help support the weight of your very own tomatoes!
- Pick, wash, enjoy!
DIY Book Review: American Boys Handy Book
016 years
Do you own a copy of The American Boy’s Handy Book? If not, I’d recommend putting it on your wish list.
Here’s a classic DIY guide geared towards projects children (with adult supervision) to teens and adults can all enjoy. If you’ve never heard of the American Boy’s Handy Book, you should definately check it out. The book includes a wide range of DIY projects, most of which are far more sophisticated DIY projects than you’d find in a Cub Scout guidebook. The projects in the book range from the fantasy (Mark Twain raft) to the questionable (DIY fireworks, various projectile devices, etc.) to the totally awesome (DIY boat building, wind skates, and so much more!).
A must for the ‘do it yourself’ person in your life.
Rating: 4.8/5.0
How to Make a Paracord Monkey Fist Knot Key Chain
016 years
by admin
in Outdoors/Camping
Just came across this great how to video on YouTube showing how to make a DIY Monkey Fist Knot Keychain. If you have some paracord or 550 cord leftover from your last projects, why not give this knot a try yourself. A monkey fist knot looks complex and is sure to attract attention. Try using a marble for the core as an alternative to the ball bearing shown.
Make a 550 Paracord Lanyard or Bracelet
016 years
by admin
in Outdoors/Camping
 Got some extra parachute cord (aka 550 cord or paracord)? Here’s a project that is both functional, attractive, and handy. Making a paracord lanyard or bracelet is a convenient way to carry a length of 10 feet or so of parachute cord for emergency or survival use.
Following a few simple knot tying methods, you can easily create a bracelet or lanyard out of 550 cord for camping, survival preparedness and as an attractive key fob.
Why Paracord? Used in parachutes for the military, this tough string has a tensile breaking strength of 550 lbs! Furthermore, it is composed of 5 or 7 inner strands that are very strong on their own and well suited to making a make-shift fishing line in an emergency or survival situation. It is also made of nylon so it is lightweight and resists mold and mildew.
Where to get parachute cord? Online or military surplus outlets. Note that there is alot of knock-off paracord available, that may serve fine for a bracelet, but might not have stength needed for camping or survival use. So be sure to check for a military rating if you intend to have it on hand for emergencies.
There are several styles of braid that you can use, but I used the method described here: http://www.theprepared.com/index.php?option=com_content&task=view&id=80&Itemid=49
Soda Can Backpack Stove
116 years
by admin
in Outdoors/Camping
 Here’s a neat little project I just stumbled upon. For those DIYers, this is a useful project if you like backpacking or camping. Constructed from pieces of aluminum soda cans, this versatile camp stove burns alcohol to produce its heat and resuses materials that would otherwise be discarded or recycled.
For my first attempt I carved up a couple of Coke cans paying little attention to making clean cuts and exact measurements and the initial set up was less than successful. However, with a little care, particularly to making clean cuts by peeling the can along scored marks, the second iteration was far more successful and more rigid.
For complete instructions on making your own handy alcohol stove from soda cans, consult: http://zenstoves.net/Stoves.htm. The author discusses various construction practices and fuels used, as well as safety hazards of each design.
The model I constructed (above) is known as a pressurized jet alcohol stove, which uses a metal insert to preheat and vaporize the fuel, pushing it out through the top jets. Open burners and pressure-regulated burners can also be similarly constructed with soda cans, tuna cans, or Altoids tins.