Computers/Electronics/Tech
Projects that include a focus on technology, computers, electronics, or automation
Do-it-yourself Wake Up Light – A Dawn Simulator Light Alarm Clock
Do you often wake feeling tired? Does the sound of your alarm clock buzzing drive you crazy? What if there were a better way?
Some people believe that your body reacts better when you wake to light– with a natural dawn simulation — easing your body into the day the way the sun does naturally.
Here’s a fun project you can do in just a few minutes given the right supplies. You can make your own wake-up light with a few simple items you may already own. Of course you could always buy one of these:
But if you’d rather be handy and make your own dawn simulator, here’s what you’ll need:
- A lamp (like the one you already have on your nightstand)
- a natural light bulb (optional), such as Verilux Standard Daylight Full Spectrum Light Bulb
- a Plug-in lamp dimmer
(optional) - On/Off 7-Day Digital Timer
A digital wall timer is recommended, because most now offer programming customizable for 7 days– this lets you set different on/off patterns for weekdays vs. weekends, etc.
Once you’ve assembled your parts, you’re ready to get going on the path to simulating natural wake up patterns with your wake up light. If you’ve opted for a full spectrum bulb (one that is closer to the sun’s own light frequencies) install the bulb in your lamp).
Important note: If you plan to use a dimmer with this project, you may want to choose an incandecent bulb — newer CFL and LED bulbs are often not compatible with standard dimmer switches.
Next, if you are using a dimmer switch, plug your lamp into the dimmer switch. Then plug into the wall timer. If not using a dimmer switch, plug directly into the wall timer.
Then, plug in the wall timer to your outlet and program your on/off patterns using the provided instructions– each timer is different, but most allow for multiple on/off times per day and per week. Consider turning the light on before you plan to wake and leaving on for an hour or more to allow your body to adjust before you rise.
If you’ve installed a dimmer switch, test the brightness you’ve selected to ensure it is to your liking. Experiment with different settings until you find the level of light that helps you rise naturally without making you cringe.
There you have it, your very own wake up light – at a fraction of the cost of commercial dawn simulators.
Note, one advantage of the commercial models is the ability to integrate an alarm sound and to grow the light brighter over time — if you find difficulty getting brightness to your liking, consider a commercial model.
How to Make an AirPrint Print Server with a Raspberry Pi
2So what exactly can you do with the $35 Raspberry Pi?
Well it turns out you can do lots of things! We’ll have more posts to follow, but the Raspberry Pi mini-computer is a low-power ARM-based microcomputer that can run alot of cool stuff through a linux distribution, including today’s project — an AirPrint Print Server.
So you have an Ipad, an Iphone, etc… and you noticed that ‘share’ option that says print — awesome right? Print right from my phone?
One catch, you don’t have an AirPrint compatibile printer and you like your current printer… no need to go out and buy an AirPrint printer.. Just turn you Raspberry Pi into an AirPrint Print server to relay your print jobs from Apple Ipad or iPhone to your existing printer.
Huge shout-out to Rohan for his original tutorial (http://rohankapoor.com/2012/06/configuring-the-raspberry-pi-as-an-airprint-server/) and tjfontaigne (https://github.com/tjfontaine/airprint-generate) for the python script that makes it possible for noobs.
Since that tutorial was made, the process of turning your Raspberry Pi into a AirPrint printer go between has become even easier. The latest versions of CUPS has added mDNS support that makes the process more streamlined.
The basic process goes like this:
1) Obtain a Raspberry Pi and a spare SD Card
2) Download WinImager32 (or your favorite image writer) and the raspbian linux distribution (http://www.raspberrypi.org/)
3) Write the linux image to your SD card and insert into your Pi. Boot and follow configuration menu… recommended to expand storage to fill card and change thee memory split to favor cpu usage ( GPU: 16Mb)
4) Update/upgrade your packages… you can do this by typing ‘sudo apt-get update’ and then ‘sudo apt-get upgrade’ — if you experience failures to any updates simply repeat until all installs are successful
5) Install CUPS (‘sudo apt-get install cups cups-pdf python-cups’); Then add your username to the lpadmin group to give access to manage the CUPS administration (‘sudo usermod -aG lpadmin yourusername’)
6) Next edit the configuration to allow yourself to manage CUPS from computers on your network outside of the Pi. (‘sudo nano /etc/cups/cupsd.conf’ will open it in an editor– Change “Listen localhost:631” –> “Port 631”; Add ‘ServerAlias *’ on the line following ‘DefaultAuthType Basic’; Add ‘Allow @Local’ under the server, admin and config files sections; Save changes.)
7) Add your printer using the CUPS web interface at the ip address of your Pi on port 631 – e.g. http://192.168.1.102:631 – Be sure to enable the option to share the printer you are adding.
8) Now that the Pi is configured to utilize your printer, it’s time to make it accessible as an Airprint server so your iOS devices will be able to print to your printer. Create a new directory /opt/airprint/; change to this directory (‘cd /opt/airprint/’) and download the script– ‘sudo wget -O airprint-generate.py –no-check-certificate https://raw.github.com/tjfontaine/airprint-generate/master/airprint-generate.py’ –then run the script: ‘sudo python airprint-generate.py’ — This should have created a new file with the name of your printer some random characters and ending ‘.service’ – If this file was generated correctly you should be all set.
9) On your iOS device, go to share on any page you want to print and select ‘print’ then select printer, your device should detect an airprint printer on your raspberry pi. Your Raspberry Pi will relay the print job directly form your iPhone as an AirPrint printer.
Enjoy!
DIY Audio Cables from Spare Cat5
0Just recently found myself with some spare Cat 5 Cable so I took a look around the net for the best new uses for the old materials… Found a great site that details how to turn your old Cat5 into a high fidelity audio cable. Take your unneeded Cat 5 ethernet cable and make some useful high quality speaker cables. Haven’t tried it yet, but they look awesome- check it out over at http://www.venhaus1.com/diycatfivecables.html
Line-Following Mini Tank with Analog Circuits!
0Today’s project comes from Chris over at pyroelectro.com – They’ve got a ton of awesome projects you can check out, but today’s highlight is a new take on a classic line following robot. a great design and great write-up, you can check out at http://www.pyroelectro.com/projects/mini_tank and make your very own robot, and make it follow lines all over your house! I like the breadboard set up and the analog circuits, so you don’t even need a microcontoller. Amazing stuff! Now if we could get a light solar panel to recharge/replace the lipo battery, it could crawl lines each day for hours all on its own….
How to choose video cables for your home theater – Video Cables Comparison
0So you got a sweet lcd screen, or maybe you got a projector and built the DIY Projector Screen ? So now you wanna know how to hook up all your video sources and what cables to use. You also want to know what the differences are between cables and why some cables are cheap and some cables are expensive? do they make a difference? Here’s how to choose the right cables:
First, check what cables you can use. You’ll need a cable the fits the source, such as a dvd player or cable box, as well as the target, such as an lcd tv… There are a number of standards that are used. and here’s a break down:
- RF Coaxial: The cable in your ‘cable tv’ – this was long the standard to bring antenna signals and cable signals into your home and to wire between them once in your home. Most VCRs and DVD players with external RF modulators may use RF coaxial cable to connect to a TV, usually tuned to channel 3 or 4 depending on region.
- Composite: typically a yellow-coded cable with RCA connectors, often matched with a pair of white- and red-coded audio cables. This is found on nearly all VHS players and most dvd players. It is also often included with other non-HD video sources and a basic standard.
- S-Video: a DIN-9 connector on both ends of a cable typically skinnier. This is considered a higher quality connection than the standard composite connection as each color channel is carried separately within the cable reducing any interference between color signals
- Component: Sometimes confused with composite, component video cables use similar RCA connectors and are typically a set of three cables, one for each color channel, or a set of 5 two of which will be standard audio cables. These connectors are better still as each color channel is now contained in its own cable. These cables are also capable of transmitting the higher resolution of HD, so they are a lower-end connector for HD systems.
- DVI: DVI cables were briefly included as a standard on many computers and lcd monitors before being replaced by HDMI cables soon after. Depending on the sources and targets these cables may be used with both analog (DVI-A) and digital devices (DVI-D). for example, some monitors may received analog inputs to their DVI connections through a VGA to DVI adapter, while later devices may receive digital inputs through their DVI connections via an HDMI to DVI adapter.
- HDMI: The modern HD standard, this small connector features fully digital connections betwen source and target and is best suited for High-definition applications and is most likely to be included on your blu-ray player or upscaling DVD player as well as almost all modern LCD or LED HDTVs.
After considering the available options that you can use to connect your components, consider the lengths of cables and costs. RF coaxial cable is probably the cheapest and will perform well over relatively long runs, but it is also the lowest quality picture… Composite cables may yield decent results in short runs of 3 to 6 ft, but will drastically suffer in runs 12ft-25ft or longer unless an extremely high quality 75 ohm cable with shielding is used. S-video may perform better but again, in longer runs, the quality will drop off dramatically. Component cables are likely included on your HD-ready source so this may be a good option, but consider HDMI for longer runs, where it’s available on source and target.
DIY Weather Monitor Forecaster and Recorder
0Okay, this one’s intense, but the result is stunning. Do you like weather? Do you like to know the forecast and keep track of barometric pressure changes and temperature. Here is a spectacular DIY creation – a DIY Weather Recorder: http://www.qsl.net/ve2emm/pic-projects/wter_rec/weather.html
How to make a PIC-based electronic combination lock
0Here’s an awesome DIY electronic project for those of you who know some PIC programming. Based on the 16F84 PIC microcontroller, an 8-bit microcontroller in the PIC family from Microchip, this project makes a simple DIY circuit that checks for combination of button presses to perform an action, such as unlock a door. With slight modifications this project should be adaptable to the more widely available 16F88 with integrated oscillator. There’s also a newer version for the PIC 16F628 with an optional lcd output.
Check it out at: http://jap.hu/electronic/combination_lock.html.
If anyone tries it out, let me know how it works out and anything you learn in the process.

How to Make a $20 DIY Projector Screen
1Got a good lcd or dlp projector? Do you want to know how to make your own cheap projector screen / diy projector screen? Here’s how (these directions make a 3:4 screen with approx 80 inch diagonal–adjust to your own specifications):
What you need:
- Two (2) yards of 54″ white/white budget blackout cloth – from joann.com – normal price $5.99/yd ($2.99 with 50% coupon code from retailmenot.com) Total: $5.98+shipping/tax= $14
- Three (3) 1″x3″x8′ firring strips from Home Depot – $1.34/ea Total: $4.02+tax = $5
- 20 or so 1/2″ wood screws, Total: $1
- Scrap 1/4″ plywood, 1 sq ft is enough Total: Free
- Staple Gun with staples (assume you have this already, if not, I got the Arrow Fastener T50 Heavy Duty Staple Gun
for about $20)- it’s a workhorse, built to last
- Saw
- Hammer
- Straight edge
- Tape measure
Steps:
- Start by measuring the firring strips to the appropriate lengths. To make an 80 inch diagonal 3:4 ratio DIY projector screen, you’ll need two 43″ lengths (sides) and two 64″ lengths (top and bottom).
- Cut the firring strips to the measured lengths
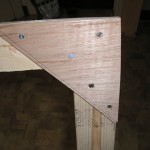
- Cut 4 right angle triangles from the plywood, large enough to support the corners.
- Attach the plywood triangles to the corners of the frame using the wood screws, being sure to attach the screws so as to secure the frame tightly in place.
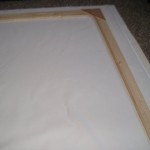
- Unroll the blackout cloth, smoother side down on a large, clean carpeted area. Place wooden frame face-down, centered onto the cloth.
- Fold one side up over the frame and staple, starting from the middle and working out. Tap staples down with hammer to tighten grip.
- On the opposite side of the frame, firmly pull the cloth tightly over the frame and staple, again from middle outward, being sure to fix any wrinkles. Once it looks tight and flat, hammer down the staples on this side also.
- Repeat steps 6 and 7 for the remaining sides, being sure pull the cloth as tight as possible by hand.
- Finish the corners with staples to hold the fabric folds.
- (Optional) Cut excess cloth with a utility knife, being sure not to nick your screen.
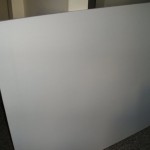
- Hang and project on your new $20 DIY projector screen.
Best Place to Buy Cheap Electronic Components
0A question I’m frequently asked: “I’d love to make this circuit or DIY electronic project i saw online– but, i went to radioshack and all the stuff costs so much!? Where can I get the components cheap?
Well, sadly as “The Shack” has transitioned away from radio building and into a cell phone kiosk, Radio Shack now charges REDICULOUS prices for simple components. I’m glad to say, with the internet now everywhere, you don’t have to go to the shack and pay these prices. But since online ordering can take some time, its a good idea to plan ahead and stock a parts bin, so you’ll have most of the common components on hand when you see that great DIY electronics project online.
Where do I shop? Well, my favorite for stocking a parts bin is, handsdown, Goldmine Electronics- it is definately the best place to buy cheap electronic components. Be sure to check their clearance and assortments, but definately do a search for “surprise” — nothing could be better for stocking a parts bin!
For around 8 dollars (pricing might have changed) the assortment in their large surprise box was more than enough resistors, capacitors, doohickeys, switches, knobs, for many projects. Because every surprise box is different (though they seem to run in batches), I’d recommend adding one surprise box to your order whenever you find yourself back on their site for some specific parts.
Over the course of time, I’ve received everything from small cell phone lcd screens, to mostly complete cell phones, more snap-in 120v lamps and mono 3.5mm jacks than i could ever know what to do with and lots of other really neat stuff to tinker with.
What to do with an old computer?
0A recent book from Randy Sarafan has the answer: 62 Projects to Make with a Dead Computer And Other Discarded Electronics
Broken laptop? Broken Mouse? Broken flat-screen tv? This book addresses it all. why throw all the broken stuff in the trash when you can put it to use. Make something useful and fun with that old junk.


